A sudden blackout plunges your home into darkness, silence descends, and the hum of everyday life grinds to a halt. In that moment, a home generator can feel like a lifeline, promising comfort and continuity. But connecting one isn't as simple as plugging in a toaster. The truth is, mastering the Essential Equipment for Safe Home Generator Connection isn't just about convenience; it's about protecting your family, your property, and even utility workers from potentially fatal hazards.
Done right, a generator provides crucial backup power. Done wrong, it can create a silent, invisible killer, ignite electrical fires, or send lethal electricity back into the grid. This guide cuts through the confusion, offering a clear, authoritative path to safely connecting your generator, ensuring your peace of mind when the power goes out.
At a Glance: Key Takeaways for Safe Generator Connection
- A Transfer Switch is Non-Negotiable: This is the single most critical piece of equipment, preventing dangerous "backfeeding" into utility lines.
- Consult a Licensed Electrician: Professional installation of a transfer switch and inlet box is paramount for safety and code compliance.
- Mind the CO: Generators produce deadly carbon monoxide. Always operate them at least 20-25 feet away from your home, windows, and doors.
- Match Your Equipment: Ensure your generator's wattage, plug type, and the transfer switch/inlet box are compatible.
- Regular Maintenance is Key: Test your generator monthly, follow maintenance schedules, and inspect connections to ensure reliability.
The Unseen Dangers: Why Generator Safety Isn't Optional
Connecting a generator directly to your home's electrical system without the right safeguards is like driving a car without brakes—it’s a disaster waiting to happen. The allure of immediate power during an outage often overshadows the inherent risks, but understanding these dangers is the first step toward true safety.
Backfeeding: A Silent Threat to Utility Workers
Imagine a utility worker trying to restore power to your neighborhood. They believe the lines are dead, making them safe to work on. But if your generator is directly connected to your home’s wiring without a proper isolation device, it can send electricity back through the utility lines. This phenomenon, known as "backfeeding," electrifies the grid your home is connected to, turning seemingly inert power lines into lethal conductors. It's an invisible killer, and it's why a specific piece of equipment is absolutely mandatory.
Carbon Monoxide Poisoning: The Invisible Killer
Generators run on fuel, and like any internal combustion engine, they produce exhaust. This exhaust contains carbon monoxide (CO), an odorless, colorless, and tasteless gas. When generators are operated indoors, in garages, under carports, or too close to windows and doors, CO fumes can rapidly accumulate inside your home, leading to carbon monoxide poisoning. Symptoms can mimic the flu, but exposure can quickly become fatal.
Electrical Mayhem: Fires and Appliance Damage
Improper wiring or attempting to bypass safety mechanisms can have devastating consequences for your home's electrical system. Incorrect connections can overload circuits, causing wires to overheat and potentially ignite electrical fires. Beyond the fire risk, unstable voltage or current fluctuations from a poorly integrated generator can fry sensitive electronics and appliances, turning a temporary power solution into a costly repair bill.
The Linchpin: Understanding Your Transfer Switch
Given the serious risks, it’s clear that haphazard connections are out of the question. This brings us to the most critical component in any safe home generator setup: the transfer switch. It's not just a convenience; it's a safety device mandated by electrical codes.
What is a Transfer Switch and Why is it Non-Negotiable?
At its core, a transfer switch is an electrical switch that isolates your home's electrical system from the utility grid before allowing generator power to flow in. Think of it as a gatekeeper: it ensures that at no point are both utility power and generator power connected to your home simultaneously. This complete isolation is what prevents backfeeding, safeguarding utility workers and your own electrical system.
It acts as the central control for managing your home’s power source during an outage, allowing you to seamlessly (or manually, depending on the type) switch between utility power and generator power. Without it, you’re risking everything. In fact, if you’re wondering how to hook up a generator, the answer unequivocally starts with a transfer switch.
Manual Transfer Switches (MTS): Control in Your Hands
A Manual Transfer Switch (MTS) requires you to physically flip a switch to change your home's power source. When the utility power goes out, you’ll manually start your portable generator, plug it into an inlet box (more on this in a moment), and then go to your MTS to switch from "utility" to "generator" power.
Pros:
- Cost-Effective: Generally much more affordable than an automatic transfer switch.
- Simplicity: Fewer complex electronics, meaning less to potentially go wrong.
- Flexibility: Often used with portable generators, allowing you to power specific circuits you've chosen in advance.
Cons: - Manual Operation: Requires physical intervention during an outage (starting the generator, flipping the switch).
- No Automatic Power: You won't get instant power restoration; there's a delay while you set everything up.
Manual transfer switches are an excellent choice for portable generators and for homeowners who want to power essential circuits (like a refrigerator, a few lights, and a well pump) without the higher investment of an automatic system.
Automatic Transfer Switches (ATS): Seamless Power
An Automatic Transfer Switch (ATS) takes the human element out of the equation. Typically paired with standby generators, an ATS constantly monitors the incoming utility power. The moment it detects an outage, it automatically signals the standby generator to start, waits for it to come up to speed, and then seamlessly transfers your home's power supply from the utility grid to the generator. When utility power is restored, the ATS automatically switches back and shuts down the generator.
Pros:
- Seamless Operation: Power is restored automatically, often within seconds, without any intervention.
- Convenience: Ideal for homeowners who want a hands-off backup power solution.
- Whole-Home Power: Often integrated with larger standby generators to power an entire home.
Cons: - Higher Cost: Significantly more expensive due to the advanced automation and often larger generator required.
- Professional Installation: Absolutely requires professional installation and wiring.
Automatic transfer switches are the preferred choice for standby generators, providing a "set it and forget it" solution that mirrors the reliability of utility power. They're perfect for larger homes, those with critical medical equipment, or anyone who values uninterrupted convenience above all else.
Deciding Between MTS and ATS: Factors to Consider
Your choice between a manual and automatic transfer switch boils down to a few key factors:
- Your Generator Type: Portable generators almost exclusively use manual transfer switches (or reliance on extension cords for specific appliances, but never directly to the panel). Standby generators always use automatic transfer switches.
- Budget: Manual systems are significantly more budget-friendly upfront.
- Convenience vs. Hands-On: Do you want to be involved in the process, or do you prefer an invisible transition?
- What You Need to Power: If it's just a few critical circuits, an MTS is often sufficient. For whole-home power, an ATS is generally necessary.
Beyond the Switch: Other Key Connection Components
While the transfer switch is the star player, a few other pieces of equipment are essential for a safe and robust generator connection, especially when using a portable unit.
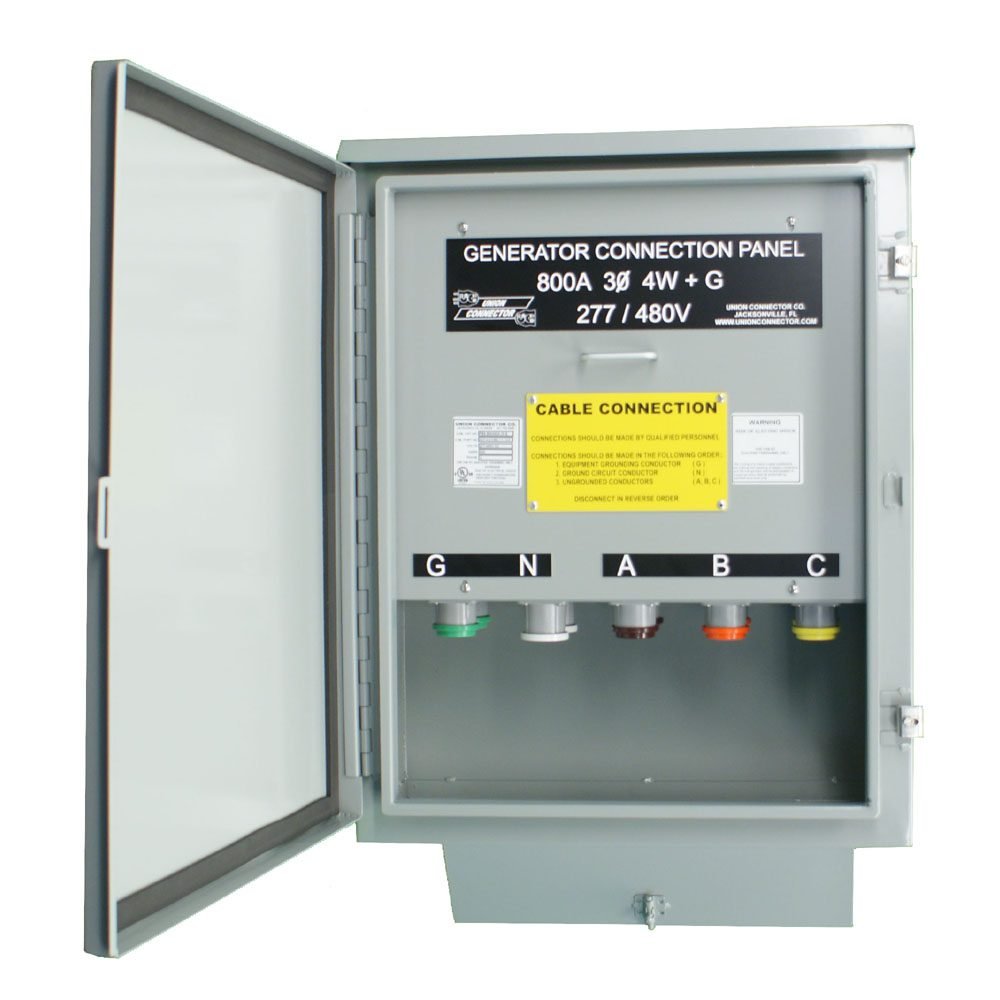
The Generator Inlet Box: Your Secure Access Point
If you're using a portable generator with a manual transfer switch, you'll need a generator inlet box. This weather-resistant box is typically mounted on the exterior of your home and wired directly to your manual transfer switch by a licensed electrician. It provides a dedicated, safe, and code-compliant plug-and-play connection point for your generator's heavy-duty power cord.
- Why it's essential: It centralizes the connection, protects the wiring, and provides a secure, weatherproof point for the generator cable. It ensures a proper, locked connection, unlike simply running extension cords into the house.
- Amp Options: Inlet boxes come in different amperage ratings, most commonly 30-amp or 50-amp, to match the output of your portable generator.
Heavy-Duty Generator Cords: Not Just Any Extension Cord
Forget your household extension cords. Connecting a generator to an inlet box (and thus to your transfer switch) requires a heavy-duty, generator-rated power cord specifically designed to handle the high amperage and voltage. These aren't your typical orange cords.
- Gauge Matters: Generator cords have much thicker wire gauges to safely carry the significant electrical load without overheating.
- Length: Choose a cord long enough to reach your inlet box while allowing your generator to be positioned at a safe distance (20-25 feet) from your home. Too short, and you compromise CO safety. Too long, and you increase voltage drop.
- Weather Resistance: Look for cords designed for outdoor use, resistant to moisture and abrasion.
Matching Plug Types: The Right Fit Matters
Generator connections use specific plug and receptacle configurations to ensure proper amperage and voltage matching. The most common types you'll encounter are:
- NEMA L14-30: This is a 30-amp, 120/240-volt locking plug, commonly found on portable generators. The "L" indicates it's a locking type, which prevents accidental disconnection.
- NEMA 14-50: This is a 50-amp, 120/240-volt plug, often used for larger portable generators or RV connections. It's a straight-blade type, not locking.
It's crucial that the plug on your generator cord perfectly matches the receptacle on your generator inlet box (and your generator's output receptacle). Using adapters or forcing ill-fitting plugs is an electrical hazard.
Picking Your Powerhouse: Generator Selection & Sizing
Before you even think about connecting, you need the right generator. This isn't a one-size-fits-all decision.
Portable vs. Standby: Which is Right for You?
- Portable Generators:
- Description: Mobile units, typically gasoline-powered, that you manually set up and connect during an outage.
- Best For: Powering essential circuits (refrigerator, lights, furnace fan, TV, small electronics). Good for occasional outages or smaller power needs.
- Pros: Lower initial cost, can be used for various purposes (camping, job sites), easy to move.
- Cons: Manual operation, fuel storage/refilling, noise, weather exposure.
- Standby Generators:
- Description: Permanently installed, typically fueled by natural gas or propane, that automatically activate when utility power fails.
- Best For: Whole-home power, seamless operation, frequent or long-duration outages.
- Pros: Automatic, runs on continuous fuel supply (natural gas), quieter than most portables, weather-protected.
- Cons: High initial cost, professional installation required, permanent fixture on your property.
Sizing Your Generator: The Wattage Math
One of the most common mistakes is getting a generator that’s too small (or too large, wasting money). Proper sizing ensures you can power everything you need without overloading the unit.
- List Your Essentials: Decide exactly what appliances and devices you absolutely must power during an outage (e.g., refrigerator, specific lights, furnace, well pump, computer).
- Find Running Watts: For each item, locate its "running watts" (the power it continuously consumes) on the appliance label or owner's manual.
- Identify Starting Watts (Surge Watts): Many motor-driven appliances (refrigerators, pumps, HVAC fans) require a brief surge of extra power to start up. This is their "starting watts" or "surge watts," which can be 2-3 times their running watts. You only need to account for the single largest starting wattage among your critical items, as you'll typically start them one by one.
- Calculate Total Running Watts: Add up the running watts of all the items you want to power simultaneously.
- Calculate Total Starting Watts: Take your "Total Running Watts" and add the single largest "Starting Watts" from your list. This is your maximum momentary power demand.
- Add a Buffer: Choose a generator with a running wattage capacity that is at least 10-20% above your calculated total running watts, and a starting wattage capacity that exceeds your calculated total starting watts. This buffer prevents overloading and prolongs generator life.
Example:
- Refrigerator: 800 running watts / 2200 starting watts
- Furnace Fan: 700 running watts / 1200 starting watts
- Lights (5): 500 running watts (no starting watts)
- TV/Modem: 300 running watts (no starting watts)
Total Running Watts: 800 + 700 + 500 + 300 = 2300 watts
Largest Starting Watts: Refrigerator at 2200 watts.
Required Generator Starting Watts: 2300 (running) + 2200 (largest starting) = 4500 watts.
So, you'd look for a generator with at least 2500-3000 running watts and around 4500-5000 starting watts.
The Blueprint for Safety: Step-by-Step Connection Guide
Once you've chosen your generator and collected all the essential equipment, it’s time for the installation and connection process. Remember, the initial setup should always involve a professional.
1. Call in the Pros: Licensed Electrician First
This cannot be stressed enough: Always consult and hire a licensed electrician for the installation of your transfer switch and inlet box. They will ensure the system is wired correctly, complies with all local electrical codes, and obtain any necessary permits. This isn't a DIY project for anyone without specialized training. A licensed electrician will:
- Assess your home's electrical panel and power needs.
- Install the transfer switch near your main electrical panel.
- Wire the transfer switch to the specific circuits you've chosen to power.
- Install the generator inlet box on an exterior wall (if using a portable generator).
- Ensure all connections are secure and safe.
2. Finalize Your Generator Choice
Based on your wattage calculations and type preference (portable vs. standby), ensure your chosen generator is ready to go. Break it out of the box, read the manual, and prepare it according to the manufacturer's instructions (e.g., adding oil, checking fuel levels).
3. Transfer Switch Installation: The Heart of the System
As mentioned, your electrician will handle this. The transfer switch will be mounted and wired, physically connecting to your home's electrical panel and either the generator's dedicated wiring (for standby units) or the inlet box (for portables).
4. Inlet Box Setup (if using a portable generator with an MTS)
Your electrician will install the inlet box on an exterior wall, usually close to your electrical panel, and wire it directly to your manual transfer switch. This provides the external access point for your generator cable.
5. Optimal Generator Positioning: CO Safety Paramount
This step is entirely up to you and critical for preventing carbon monoxide poisoning.
- Distance: Place the generator on a flat, stable surface at least 20-25 feet away from your home.
- Location: Ensure it's away from windows, doors, vents, and any other openings that could allow exhaust fumes to enter your living space.
- Ventilation: Operate it in a well-ventilated area, never in a garage, basement, or partially enclosed structure.
- Clearance: Maintain at least a 5-foot radius of clearance around the generator to prevent fire hazards and allow for proper air circulation.
- Weather Protection: If rain or snow is expected, use a generator tent or cover specifically designed to operate a generator in wet conditions. Never operate it uncovered in direct rain.
6. Turn Off Main Power: Mandatory First Step
Before you connect your portable generator to the inlet box, always take this crucial safety step:
- Locate your main circuit breaker in your home's electrical panel.
- Flip it to the "OFF" position. This completely isolates your home from the utility grid, ensuring no electricity can backfeed into the utility lines. This step is critical even with a transfer switch, acting as a redundant safety measure before making the physical connection.
7. Make the Generator Connection
With the main utility power off, you can now safely connect your portable generator.
- Plug your heavy-duty, generator-rated power cord into the generator's output receptacle.
- Run the other end of the cord directly to your exterior generator inlet box.
- Firmly insert the plug into the inlet box's receptacle and twist to lock it if it's a locking plug type (e.g., NEMA L14-30). Ensure a secure connection.
8. Start the Generator
Now you're ready to bring your generator to life.
- Turn off all individual circuit breakers in your transfer switch panel. This prevents a sudden surge of power to all connected appliances when the generator starts.
- Follow your generator's manufacturer instructions to start it. This typically involves opening the fuel valve, choking the engine (if applicable), and pulling the recoil starter or pressing the electric start button.
- Allow the generator to run for a few minutes to warm up and stabilize its voltage output.
9. Activate Power to Home
With the generator running smoothly, you can now energize your home.
- Manual Transfer Switch (MTS): Go to your MTS and flip the main selector switch from the "Utility" or "Line" position to the "Generator" position.
- Individual Circuits: One by one, flip on the individual circuit breakers within the transfer switch panel that correspond to the circuits you want to power.
- Appliance Startup: After activating a circuit, turn on connected appliances one at a time. This prevents overloading the generator with a large initial surge of power. Start with the most critical, high-wattage items first (e.g., refrigerator).
Keeping the Lights On (Safely): Operation & Maintenance Best Practices
Connecting your generator is just the beginning. Safe and reliable operation comes from consistent monitoring and maintenance.
Constant Vigilance: CO Detectors & Fuel Safety
- CO Detectors: Install battery-operated carbon monoxide detectors on every level of your home, especially near sleeping areas. Test them monthly and replace batteries annually. This is your primary defense against CO poisoning.
- Fuel Refilling: NEVER refuel a generator while it's running or hot. Turn it off, allow it to cool completely, and then refill with the correct type of fuel in a well-ventilated outdoor area. Spilled fuel on a hot engine is a major fire hazard.
- Emergency Plan: Have a family emergency plan that includes generator safety, evacuation routes, and a meeting point.
Power Management: Avoid Overloading
- Know Your Limits: Never exceed your generator's rated running or surge wattage. Overloading can damage the generator, connected appliances, and create fire hazards.
- Wattage Meter: Consider investing in a wattage meter that can plug into your generator's outlets or a whole-home energy monitor connected to your transfer switch. This helps you actively monitor how much power you're drawing.
- Prioritize: If you notice the generator struggling, immediately turn off non-essential appliances.
Graceful Shutdown: Protecting Your Appliances
Before shutting down your generator:
- Turn off all connected appliances first. This prevents sudden voltage drops or surges that can harm sensitive electronics when the generator's power supply abruptly ceases.
- Flip off all individual circuit breakers in your transfer switch panel.
- Flip the main selector switch on your MTS back to the "Utility" or "Line" position.
- Shut down the generator following the manufacturer's instructions.
- Once the generator is off, you can then flip your home's main utility breaker back on (assuming utility power has been restored).
Test Drives: Regular Operation Checks
Don't wait for an emergency to discover your generator isn't working.
- Monthly Test Runs: Start your generator and run it under a partial load (e.g., connecting a few appliances) for 15-30 minutes each month. This lubricates components, circulates fuel, and helps identify potential issues.
- Voltage Output: Use a multimeter to regularly check the voltage output from your generator's receptacles to ensure it's within the safe operating range (typically 120V and 240V, depending on the outlet).
Proactive Maintenance: Extending Lifespan
Just like your car, a generator needs regular maintenance to perform reliably.
- Follow Manufacturer's Schedule: Adhere strictly to the oil change, air filter replacement, and spark plug replacement intervals recommended in your owner's manual.
- Inspect Connections: Before and after each use, inspect all cables, cords, and connections for fraying, cracks, or damage. Replace any damaged components immediately.
- Cleanliness: Keep the generator clean and free of dirt, debris, and fuel spills. Ensure cooling fins are not obstructed.
Fuel & Storage Smarts
- Fresh Fuel: Use fresh gasoline. Stale fuel can gum up the carburetor. For gasoline generators, use a fuel stabilizer if storing fuel for more than a month or if the generator will sit unused for extended periods.
- Approved Containers: Store gasoline in OSHA-approved containers, clearly labeled, and away from living areas, heat sources, and direct sunlight.
- Generator Storage: When not in use, store your generator in a dry, well-ventilated area. If storing for an extended period, follow "long-term storage" instructions in your manual (often involves draining the fuel tank or running it dry).
Your Generator Safety Questions, Answered
Let's clear up some common misconceptions and questions about generator safety.
Can I just run extension cords from my generator directly into my house?
Technically, yes, but only for individual appliances and never as a whole-home solution. Running individual, appropriately rated extension cords from the generator to power specific appliances (like a refrigerator or a lamp) is acceptable. However, you absolutely cannot run an extension cord from your generator into a wall outlet in your home (known as "backfeeding through a wall outlet"). This creates an immediate and severe backfeeding hazard to the utility grid.
Do I really need a transfer switch? It seems like a lot of hassle.
YES, you absolutely need a transfer switch if you intend to power circuits within your home's electrical panel. Any attempt to directly connect a generator to your home's wiring without a transfer switch is illegal, incredibly dangerous, and can be fatal to utility workers or cause severe damage to your home. It's not a hassle; it's a non-negotiable safety device.
What's the most common generator mistake people make?
By far, the most common and deadliest mistake is improper generator placement leading to carbon monoxide poisoning. People often place generators too close to their home, in garages, or under eaves, allowing the deadly fumes to enter the house. Always remember the 20-25 foot rule and use CO detectors.
My generator has GFCI outlets. Is that enough protection?
While GFCI outlets provide protection against electrical shock from the generator itself, they do not prevent backfeeding into your home's electrical system or the utility grid. A GFCI outlet is a safety feature for the equipment plugged directly into it, not for the entire home's wiring. A transfer switch remains mandatory for safe home connection.
Empowering Your Home, Safely.
Having a home generator is a smart move for resilience during power outages. But its benefits are only fully realized when safety is paramount. By understanding the critical role of a transfer switch, ensuring professional installation, diligently following operational guidelines, and committing to regular maintenance, you transform a potentially dangerous tool into a reliable source of power and peace of mind. Invest in the right equipment, prioritize professional setup, and embrace safe practices—your family's well-being depends on it.