Imagine the lights flicker, then plunge your home into darkness. The hum of the refrigerator fades, and the digital clock on the microwave goes blank. A power outage. For many, this is just an inconvenience. But for those who've invested in a backup generator, it's an opportunity to maintain comfort and crucial services. The bridge between your powerful generator and your home's electrical system isn't a tangle of extension cords, but a vital piece of equipment: a manual transfer switch.
This comprehensive Manual Transfer Switch Installation and Connection Guide will walk you through everything you need to know to safely and effectively integrate a generator into your home's power supply. It’s a project that demands respect for electricity, a keen eye for detail, and an unwavering commitment to safety. While the process can be handled by a savvy DIYer, we'll also discuss when it's always best to call in the pros.
At a Glance: Key Takeaways for Your Transfer Switch Project
- Safety First, Always: Never work on your electrical system without turning off the main power and verifying it's off.
- Why a Transfer Switch? It safely isolates your home from the utility grid, preventing dangerous "backfeed" from your generator.
- Matching Your Setup: Choose a switch that matches your generator's power output and your home's electrical load.
- Location, Location: Install the switch in a dry, accessible spot near your main electrical panel, adhering to local codes.
- Wiring Basics: Connect color-matched wires correctly (hot to hot, neutral to neutral, ground to ground) and ensure all connections are tight.
- Test Thoroughly: After installation, carefully test the system to ensure everything functions as expected before relying on it in an emergency.
- Maintenance Matters: Regular inspection and testing will keep your transfer switch reliable for years.
Understanding the "Why": More Than Just a Switch
Before we dive into the nuts and bolts, let's clarify why a manual transfer switch isn't just a convenience – it's a non-negotiable safety device. When you hook up a generator to your home, you're essentially creating a separate power source. Without a transfer switch, there's a serious risk of "backfeeding" electricity from your generator into the utility grid.
Imagine linemen working to restore power after a storm. If your generator is backfeeding, it could send a lethal surge of electricity back down the lines, endangering their lives and potentially damaging your generator or other household equipment. A manual transfer switch acts as a secure gatekeeper, allowing you to switch between utility power and generator power, but never letting both connect to your home's circuits simultaneously. It ensures a safe, clean, and isolated transfer of electricity.
Gearing Up: Planning Your Manual Transfer Switch Project
Like any successful project, careful planning and preparation are your best friends. Skimping here can lead to headaches, safety hazards, or a switch that doesn't meet your needs.
Choosing the Right Transfer Switch for Your Home
This is where many homeowners start to feel overwhelmed, but it doesn't have to be complicated. Your transfer switch needs to be compatible with your generator and adequately sized for the circuits you want to power during an outage.
- Generator Power Output: Check your generator's wattage. Your transfer switch must be rated to handle this load. For example, a 7,500-watt generator might require a 30-amp transfer switch, while a larger 10,000-watt generator might need a 50-amp switch.
- Number of Circuits: How many essential circuits do you want to power? Think about your furnace, well pump, refrigerator, some lights, and perhaps a few outlets. Transfer switches come with varying numbers of pre-wired circuits (e.g., 6, 8, 10, or more). Choose one that offers enough dedicated circuits for your critical needs. You'll connect specific breakers from your main panel to the transfer switch.
- Amperage Rating: This rating (e.g., 30A, 50A) should match your generator's output and your home's main panel capacity if you plan to power your entire home (though most manual switches are for selected circuits).
- Compatibility: Ensure the transfer switch is compatible with your electrical panel type and wiring configuration. If in doubt, consulting a licensed electrician at this stage is a smart move.
Tools & Materials: Your Project Checklist
Gathering everything before you start saves countless trips to the hardware store.
Essential Tools:
- Screwdrivers: Flathead and Phillips, various sizes for panel and switch terminals.
- Wire Strippers/Cutters: For cleanly preparing electrical wires.
- Voltage Tester/Multimeter: CRUCIAL for verifying power is off. A non-contact voltage tester is also excellent for quick checks.
- Drill & Drill Bits: For mounting the transfer switch.
- Level: To ensure your switch is mounted straight.
- Tape Measure: For accurate placement and conduit runs.
- Pencil/Marker: For marking drill holes.
- Pliers (various types): Needle-nose, lineworker's for bending/tightening wires.
Materials You'll Need: - The Manual Transfer Switch: Your carefully chosen unit.
- Electrical Wires: Sized appropriately for your generator and the circuits you're connecting (e.g., 10-gauge for 30A, 6-gauge for 50A).
- Conduit & Connectors: If required by local codes or for protection when running wires.
- Mounting Hardware: Screws, anchors (if mounting into drywall).
- Wire Nuts/Connectors: For securing splices (though most connections will be to terminals).
- Electrical Tape: For insulation and securing connections.
- Generator Power Inlet Box: This is where you plug your generator into your house; it connects to the transfer switch.
- Generator Cord: The heavy-duty cord from your generator to the inlet box.
Safety First: Before You Touch Anything Electrical
This isn't a suggestion; it's a command. Electricity is unforgiving.
- Turn Off Main Power: Locate your home's main circuit breaker and flip it to the "off" position. We'll detail this critical step shortly.
- Verify Power Off: Use your voltage tester on the main panel and the circuits you'll be working on to confirm no live current.
- Personal Protective Equipment (PPE): Wear insulated gloves and safety glasses.
- Insulated Tools: Use tools with insulated handles.
- Local Codes: Always check with your city or local building office for specific electrical codes and permit requirements. These codes are designed for your safety and compliance. If you're unsure about any step, stop and call a licensed electrician.
Finding the Sweet Spot: Locating Your Transfer Switch
The physical location of your transfer switch is more than just convenience; it's about accessibility, safety, and code compliance.
- Proximity to Main Panel: The closer the transfer switch is to your main electrical panel, the shorter your wire runs will be, simplifying installation and reducing voltage drop. Aim for directly adjacent or within a few feet.
- Dry and Protected: Choose a dry, dust-free spot. While many are installed indoors, if it must be outside, ensure it's in a covered, weather-protected area (like a garage or covered porch) and rated for outdoor use.
- Accessible Clearance: Leave ample space around the switch for easy operation, maintenance, and future inspections. You don't want to be fumbling in the dark to switch power during an outage.
- Local Regulations: Always double-check with your local building department. They might have specific requirements for how high off the ground the switch must be, how far from gas lines, or specific conduit types. Ignoring these can lead to failed inspections or unsafe conditions.
The Most Crucial Step: Verifying Your Home's Power is OFF
We're dedicating a whole section to this because it's paramount. Never assume the power is off without verifying it.
- Locate the Main Breaker: Head to your main electrical panel. Inside, you'll find a large breaker, usually at the top, clearly labeled "Main" or with your home's amperage (e.g., "200A Main").
- Flip to "Off": Firmly switch this main breaker to the "off" position. This should kill power to your entire house.
- Verify, Verify, Verify:
- Voltage Tester/Multimeter: Take your voltage tester and touch the probes to the main lugs (the large incoming wires) in your electrical panel. If it reads zero, good. Then, test several individual breakers that you'll be connecting to.
- Test Lights/Appliances: Go around your house and try to turn on lights, a TV, or other appliances that were previously working. If nothing comes on, you've successfully cut the power.
- Non-Contact Tester: For an extra layer of confidence, sweep a non-contact voltage tester over the wires you plan to work on. It will beep or light up if current is present.
- Safety Mentality: From this point forward, operate with the understanding that electricity can be dangerous. Wear your PPE.
A Solid Foundation: Mounting Your Transfer Switch
With the power off and your location chosen, it's time to physically install the transfer switch.
- Identify a Strong Wall: The switch needs a secure mounting surface. A wall stud is ideal. If you're going into drywall, plan to use appropriate wall anchors for heavy loads.
- Mark Your Drill Holes: Hold the transfer switch up to your chosen spot. Use a pencil to mark where the mounting screws will go. Use a level to ensure your marks are perfectly aligned; a crooked switch is an aesthetic and potentially operational flaw.
- Drill Pilot Holes & Install Anchors: Drill pilot holes at your marked spots. If necessary, insert wall anchors into these holes to provide a stronger grip for your screws.
- Secure the Switch: Align the transfer switch with the drilled holes. Insert your mounting screws and tighten them securely. The switch should not wobble, shift, or move when nudged. It needs to be a stable fixture.
The Heart of the Matter: Wiring Your Manual Transfer Switch
This is the most critical and potentially complex part of the installation. If you're uncomfortable with electrical wiring diagrams or making connections, this is definitely the stage to call a licensed electrician. Remember: your home's main power source is still OFF.
Connecting to Your Main Electrical Panel
This involves linking specific circuits from your main breaker panel to the corresponding breakers within the transfer switch.
- Run Wires: You'll need to run individual sets of wires (hot, neutral, ground) from the selected breakers in your main panel to the input terminals on your transfer switch. This often involves feeding wires through conduit between the two units.
- Identify Circuits: Decide which circuits you want to power with your generator (e.g., refrigerator, furnace, specific outlets). Turn off these specific breakers in your main panel.
- Disconnect Wires (Main Panel): For each selected circuit, carefully disconnect the "hot" (usually black or red) wire from its breaker in the main panel. You'll now have a loose hot wire for each chosen circuit.
- Connect to Transfer Switch Breakers: Connect these "loose" hot wires to the load side of the corresponding breakers within your transfer switch.
- Connect Transfer Switch to Main Panel Breaker: Now, you'll run a new set of wires (hot, neutral, ground) from the line side of the breakers within the transfer switch to a dedicated breaker in your main panel. This breaker effectively becomes the "master" switch for that specific circuit from your main panel to the transfer switch.
- Color Matching & Tight Connections:
- Hot Wires (Black/Red): Connect black wires to black terminals/wires, and red wires to red. These carry the live current.
- Neutral Wires (White): Connect white wires to the neutral bar, ensuring all neutral connections are tight.
- Ground Wires (Green/Bare Copper): Connect green or bare copper wires to the ground bar.
- Crucial: Every connection must be tight. Loose connections are a fire hazard and can cause intermittent power issues or voltage fluctuations. Use a screwdriver to ensure terminals are snug, but don't overtighten to strip the screws.
Connecting the Generator Inlet Box and Grounding
Now, let's bring the generator into the picture.
- Install the Generator Inlet Box: This box is typically mounted on an exterior wall near where you'll park your generator. It has a specific receptacle (e.g., L14-30R for 30A, L14-50R for 50A) where you plug in your generator cord.
- Run Wires to Transfer Switch: Run appropriately sized electrical wires from the generator inlet box to the generator input terminals on your transfer switch. This run will almost always be in conduit for protection and code compliance.
- Hot Wires: Connect the hot wires from the inlet box to the designated generator hot terminals on the transfer switch.
- Neutral Wire: Connect the neutral wire from the inlet box to the neutral bar within the transfer switch.
- Ground Wire: Connect the ground wire from the inlet box to the ground bar within the transfer switch.
- Grounding Your System: Proper grounding is paramount for safety.
- Connect Transfer Switch Ground: Connect the grounding wire from the transfer switch's ground bar to your home's main grounding system. This typically means connecting it to a grounding rod driven into the earth outside your home, or to a cold metal water pipe (check local codes, as some jurisdictions prefer dedicated grounding rods).
- Purpose: Grounding provides a safe path for fault currents to dissipate, protecting against electric shock and equipment damage in case of a short circuit or lightning strike. Ensure this connection is robust and compliant with all local electrical codes.
Remember that how to hook up a generator safely involves more than just wiring; it’s about understanding the entire electrical ecosystem of your home.
The Moment of Truth: Testing Your New Installation
Once all wiring is complete and verified, it's time to cautiously test your new manual transfer switch system. Remember, safety first!
- Double-Check All Connections: Before restoring power, meticulously inspect every single wire connection you made. Are they tight? Are colors matched? Is everything neatly tucked away and secured? Are there any exposed wires?
- Ensure Main Utility Power is OFF: Verify one last time that your home's main circuit breaker is in the "off" position. This is critical for the initial generator test.
- Restore Power to Main Panel (Briefly): Carefully flip the main breaker in your electrical panel back to "on." Since your transfer switch is installed, the circuits connected to it should not receive utility power directly at this point (they are interrupted by the transfer switch). Use your voltage tester to confirm that utility power is present at the utility side of your transfer switch, but not at the load side of the individual circuit breakers within the transfer switch (which are still connected to your generator).
- Start Your Generator:
- Take your generator outside to a well-ventilated area, away from windows and doors, and ensure it's fueled and ready.
- Plug your generator cord into the exterior generator inlet box.
- Follow your generator's starting procedures. Let it run for a few minutes to warm up and stabilize.
- Activate the Transfer Switch:
- Go to your manual transfer switch.
- Flip the individual circuit breakers within the transfer switch to the "on" position for the circuits you want to test.
- Now, carefully move the main selector switch on the transfer switch from the "Utility" (or "Line") position to the "Generator" position. You might hear a distinct "thunk" as it engages.
- Verify Power to Load:
- Go inside and check the appliances and lights connected to the circuits you activated. They should now be receiving power from the generator.
- Use your voltage tester on outlets or wires connected to these circuits to confirm safe power flow.
- Switching Back to Utility Power (Post-Outage Simulation):
- VERY IMPORTANT: Always, always turn off the main circuit breaker in your home's electrical panel before attempting to switch the transfer switch back to utility power, and before turning it off during a real outage. This prevents any potential issues or surges.
- Once the main breaker is off, flip the manual transfer switch from "Generator" back to "Utility."
- Turn off your generator.
- Now, you can safely flip your home's main breaker back to "on," and utility power will resume.
Troubleshooting Common Issues During Testing
- No Power to Load (from Generator):
- Cause: The transfer switch isn't fully engaged in the "Generator" position, or individual circuit breakers within the transfer switch aren't "on."
- Fix: Ensure the main transfer switch lever is firmly in the "Generator" detent. Check that all individual circuit breakers in the transfer switch are flipped "on." Confirm the generator is running and plugged in correctly.
- Generator Won't Start:
- Cause: Low fuel, low oil, dead battery (for electric start), choke not set correctly.
- Fix: Refuel, check oil, charge/replace battery, adjust choke/primer according to the generator manual.
- Power Fluctuations/Dim Lights:
- Cause: Loose wiring connections, generator struggling under too heavy a load, or the generator itself has an issue.
- Fix: Turn off all power and re-tighten all wire terminals you connected. Reduce the load on the generator by turning off non-essential appliances. If the problem persists, consult a generator technician.
Keeping It Ready: Maintenance for Your Manual Transfer Switch
Like any critical piece of equipment, your manual transfer switch needs periodic attention to ensure it's ready when you need it most.
- Regular Inspection (Twice a Year):
- Visual Check: Open the cover (with power off, of course!) and visually inspect for any loose connections, frayed wires, signs of arcing, or corrosion on terminals.
- Cleanliness: Keep the area around and inside the switch clean and free of dust, debris, or insect nests. Use a soft brush or vacuum.
- Dryness: Ensure the switch and its surrounding area remain dry. Any signs of moisture indicate a potential problem that needs addressing.
- Regular Testing (Quarterly):
- Don't wait for an outage to find out if your system works. Test your transfer switch at least quarterly.
- Go through the full process: turn off main power, start generator, switch to generator power, test some circuits, switch back to utility, turn off generator, restore main power.
- Listen for unusual noises, feel for excessive resistance in the switch lever, and ensure smooth operation.
- Component Replacement:
- If you notice any damaged parts, such as cracked housing, corroded terminals, or a sticky switch mechanism, replace them immediately. Don't try to jury-rig repairs on electrical components.
- Safe Checks with Testers:
- Always use a non-contact voltage tester before touching any wires or terminals, even during routine maintenance, to ensure no unexpected live current is present.
Your Questions Answered: Manual Transfer Switch FAQs
What is the primary purpose of a manual transfer switch?
A manual transfer switch safely transfers power from your backup generator to your home's electrical system, preventing dangerous backfeed to the utility grid. It protects utility workers, your home's equipment, and the generator itself.
How do you connect a manual transfer switch to a generator?
You connect the switch between your main electrical panel and an exterior generator inlet box. The generator plugs into the inlet box, which then routes power to the transfer switch. The transfer switch allows you to safely select whether your home receives power from the utility grid or the generator. Always ensure all power sources are off before wiring for safety.
Can I install a manual transfer switch myself, or do I need an electrician?
DIY installation is possible for those with solid electrical experience, a clear understanding of wiring diagrams, and a commitment to following all local electrical codes meticulously. However, given the inherent dangers of working with high voltage, hiring a licensed electrician is highly recommended for safety and to ensure compliance with all local regulations and permits. Incorrect installation can be extremely dangerous.
What is the typical cost for manual transfer switch installation?
The installation costs for a manual transfer switch typically range from $500 to $1,500. This can vary significantly based on several factors:
- Type and size of the switch: More circuits and higher amperage switches cost more.
- Labor costs: Electrician rates vary by region.
- Complexity of your electrical panel: Older panels or those with limited space can increase labor time.
- Conduit runs and wire length: Longer or more complex wiring paths add to material and labor costs.
- Permit fees: Local permits are often required.
How is a manual transfer switch different from an automatic transfer switch?
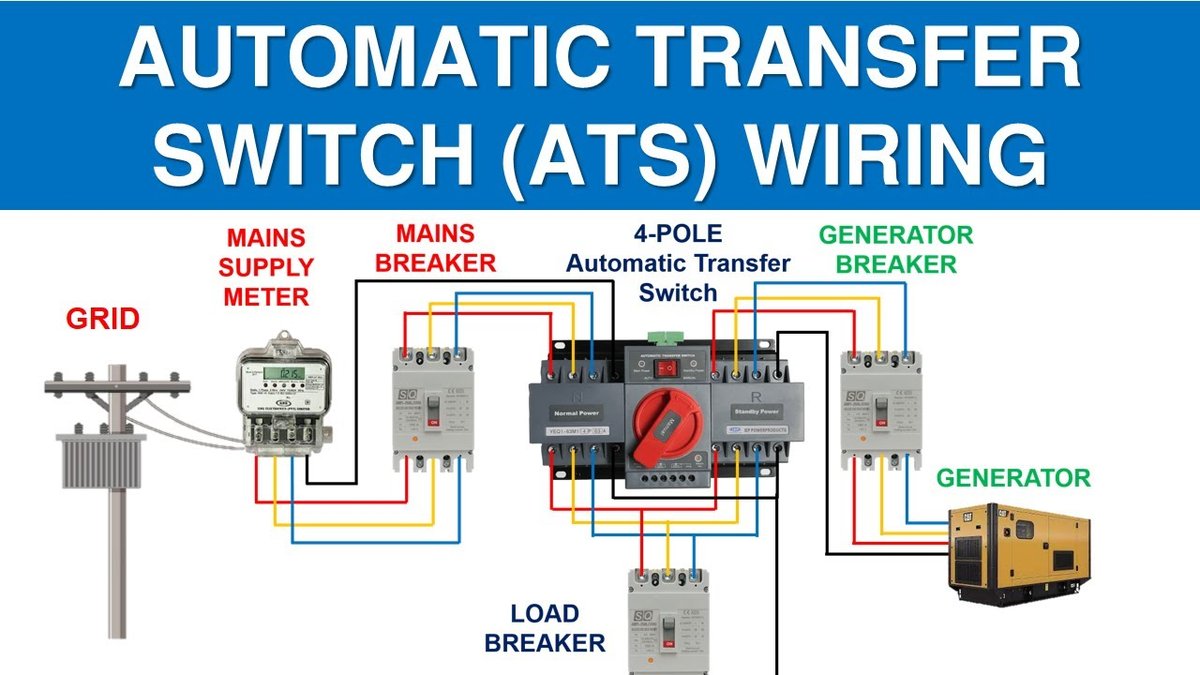
A manual transfer switch requires you to physically go to the switch and flip a lever to transfer power. An automatic transfer switch, on the other hand, detects an outage, starts your generator automatically, and transfers power without any manual intervention. Automatic switches are more expensive and complex but offer greater convenience.
Empowering Your Home Through Any Outage
Installing a manual transfer switch is a significant step towards energy independence and peace of mind during power outages. It's a project that demands respect for electrical safety and attention to detail. By carefully planning, diligently executing each step, and adhering to local codes, you'll create a robust and safe system that reliably powers your home when the grid goes dark. Whether you tackle it yourself or bring in a professional, the result is the same: confidence that your home will remain functional and comfortable, no matter what Mother Nature throws your way.